Why Do My Kitchen Shelves Sag? The Hidden Load Math Every Open Shelf Needs

Why do my kitchen shelves sag even with "heavy-duty" brackets?
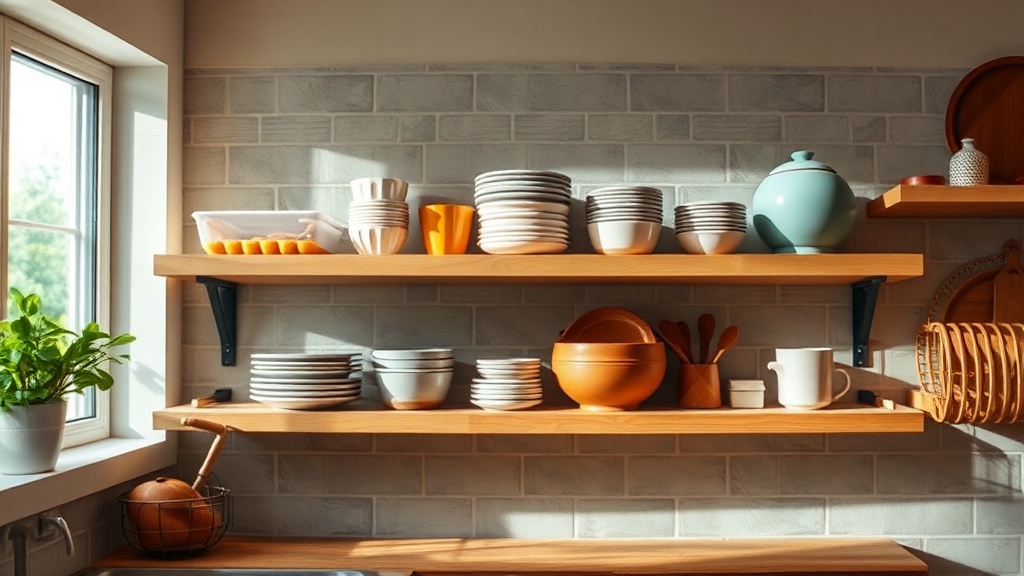
You installed what the box promised were heavy-duty brackets. You hit studs (probably). Yet six months later, your open kitchen shelves have that telltale dip in the middle—collecting dust in the low point like a tiny depression in the landscape. The problem isn't your DIY skills. It's that most shelf hardware is marketed with meaningless weight ratings that ignore the physics of cantilevered loads. When I design shelving—whether for a van conversion or a client's pantry—I don't guess. I calculate moment forces, distributed loads, and material deflection limits. You don't need an architecture degree to fix this. You just need to understand what the hardware store won't tell you.
Open shelving looks effortless, but every shelf is a beam under stress. When you stack plates, jars, and that vintage mixer you impulse-bought, you're applying a distributed load across a horizontal span. The brackets aren't just holding weight vertically—they're resisting a rotational force (the moment) that wants to pull the shelf down and toward the wall. Standard L-brackets fail because they're designed primarily for vertical compression, not that twisting moment. That's why your shelf sags in the middle even when the brackets seem secure.
What load capacity do I actually need for kitchen shelving?
Here's where we do some real math—nothing scary, just practical arithmetic. A typical dinner plate weighs about 1.5 pounds. Stack twelve plates, add four cereal bowls, a pasta maker you use twice a year, and suddenly that one shelf section is holding 25 pounds. Multiply by three shelf levels and you're at 75 pounds. But that's static weight. Kitchens have dynamic loads—you're pulling items down, sliding things around, occasionally leaning on the shelf while reaching for something higher.
The rule I follow from structural engineering: design for 3x your expected static load. If you think a shelf will hold 30 pounds of dishes, build it for 90. This isn't over-engineering—it's preventing that slow, demoralizing sag that makes your kitchen look cheap. For standard 10-12 inch deep shelves spanning 24-30 inches, you need brackets rated for at least 100 pounds each when mounted properly into studs. Don't trust the packaging claims. Look for brackets with a diagonal support gusset—that triangular piece connecting the horizontal arm to the vertical flange. That gusset is doing the structural work of resisting the moment force.
Material matters too. MDF shelves (that smooth, painted fiberboard) have a modulus of elasticity around 400,000 PSI. Solid red oak? 1.8 million PSI. Translation: oak is roughly 4.5 times stiffer than MDF. If you're set on painted shelves, use paint-grade hardwood like poplar or maple, or at minimum a high-quality plywood with hardwood edge banding. The plywood's cross-laminated structure resists warping and sagging better than any solid wood, which expands and contracts with humidity. I learned this the hard way in my van build—solid pine shelving warped so badly I had to rebuild with birch ply.
How far can I span a kitchen shelf without center support?
This is the question that separates amateur installations from professional results. The maximum span depends on three variables: shelf material thickness, material type, and intended load. For standard 3/4-inch plywood with a moderate load (dishes, small appliances), 24 inches is your safe limit. Push to 30 inches and you'll see visible deflection within months. With 1-inch hardwood, you can stretch to 36 inches, but at that span you're gambling—especially with heavier items like cast iron.
Here's a practical guideline I use: the sag limit for visible shelving is 1/32 inch per foot of span. For a 3-foot shelf, that's about 1/10 inch of sag in the center—barely perceptible but enough to notice if you're looking for it. A sagulator calculator (yes, that's the actual term carpenters use) can help you model different materials and spans. For most kitchen applications, err toward shorter spans or add a center bracket. That center support doesn't have to be ugly—a small corbel or even a decorative metal strap can double your load capacity while adding visual interest.
Bracket spacing and the stud problem
Studs are spaced 16 inches on center in modern construction, 24 inches in older homes. Your shelf brackets must hit studs—not drywall anchors, not toggle bolts unless you're under 20 pounds total load. This creates a geometric puzzle: if you want a 48-inch shelf with three brackets, the spacing won't align with standard stud patterns unless you plan carefully.
The solution is a mounting cleat—a horizontal strip of 1x3 hardwood screwed securely into multiple studs, with your brackets attaching to that cleat rather than directly to the wall. This distributes the load across more attachment points and lets you position brackets exactly where needed. Paint the cleat to match your wall and it disappears visually. I use this technique for every floating shelf installation—it provides the hidden structure that makes the visible shelf seem effortless.
Why does my shelf tilt forward and how do I stop it?
Forward tilt happens when the center of gravity of your loaded shelf moves too far from the wall. It's a leverage problem. Standard L-brackets have the vertical flange mounted on the wall and the horizontal arm extending outward. When you load the front edge of the shelf, you're creating a lever arm that wants to rotate the entire bracket away from the wall. Even if the screws don't pull out, the bracket itself can flex or the shelf can slide forward.
The fix is proper bracket selection and installation geometry. Look for brackets where the horizontal arm has a small upturned lip at the front edge—this prevents the shelf from sliding. Better yet, use concealed floating shelf brackets that mount into the wall with a long steel rod that inserts into the shelf itself. These provide support along the entire depth of the shelf, not just at the back edge. Rockler Woodworking offers several floating shelf hardware systems rated for substantial loads while maintaining that clean, bracket-free look.
If you're committed to visible brackets, install them with a very slight upward angle—about 1/16 inch higher at the front than the back. As the load settles and the brackets flex slightly, the shelf will settle to level rather than tilting forward. Check with a level during installation, then nudge that front edge up just a hair. It's one of those invisible adjustments that makes the difference between amateur and professional results.
The hidden reinforcement: shelf stiffeners
Even with perfect brackets, a long shelf can twist or sag. The secret weapon is a shelf stiffener—a strip of wood or metal attached to the front edge or underside of the shelf that increases its moment of inertia (resistance to bending). A simple 3/4-inch square hardwood strip glued and screwed to the front edge of a plywood shelf effectively doubles its load capacity. For painted shelves, this becomes a decorative feature—a bullnose edge or applied molding that hides its structural purpose.
For open kitchen shelving where the underside is visible, consider an aluminum C-channel or T-track installed in a shallow groove on the bottom surface. It's invisible from normal viewing angles but adds significant rigidity. This Old House has excellent diagrams showing how these hidden reinforcements work in practice.
The bottom line? Open shelving that lasts requires thinking like a structural engineer for about thirty minutes during planning. Calculate your loads, choose materials with appropriate stiffness, mount into solid structure (not drywall), and consider the geometry of how forces travel through the system. Your future self—reaching for a plate without watching the shelf flex—will thank you for doing the math upfront.