The DIY Confidence Gap: Why Women Skip Power Tools (And How Easy It Actually Is)

Let's talk about why you think you can't.
Not "why you haven't yet." Why you think — genuinely believe, somewhere in the back of your head — that power tools are for someone else. Someone who grew up in a garage. Someone who took shop class. Someone who is, for reasons that have nothing to do with physics, not you.
I built a van. Not a sprinter conversion kit with pre-cut panels and color-coded brackets. I mean I took a 2003 Dodge Ram 1500 with a leaking roof and a mouse problem, drew my own insulation plan on graph paper, and built every inch of it with my own hands. The first time I held a circular saw, I was 29, in a Home Depot parking lot, and my hands were shaking. Not because I was incapable. Because nobody had ever handed me one before and said "this is yours to learn."
That was the whole problem. Capability was never missing. Invitation was.
The Narrative Is Lying to You
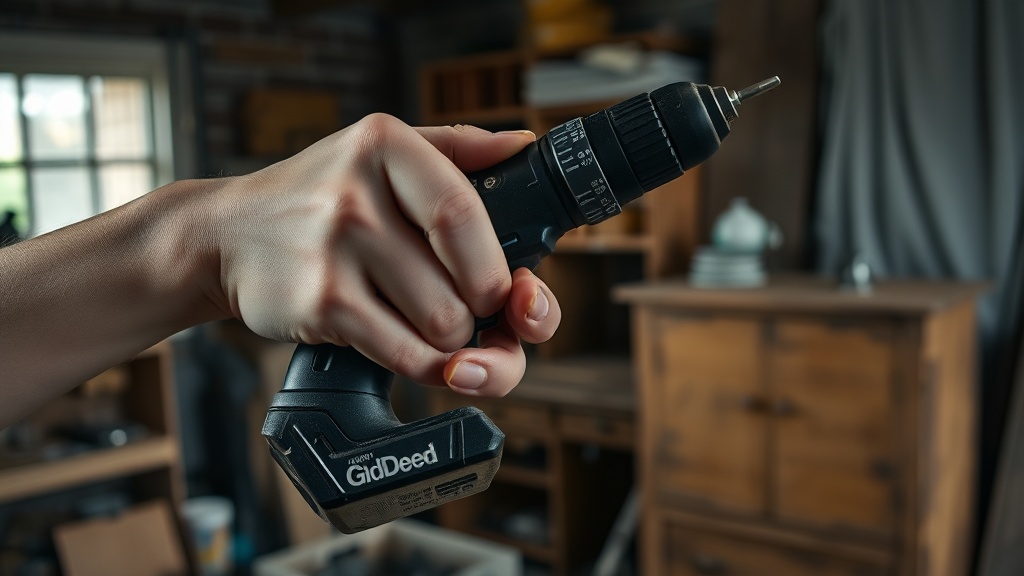
Here's what's actually true about a power drill: it spins a bit in the direction you point it. That's it. The physics do not consult your gender, your nail length, your grip strength, or your relationship to your father's tool bench. A 1/2" impact driver generates 1,800 in-lbs of torque regardless of who's holding it.
What IS gendered: the packaging. The instruction videos where the tool-confident person is always the same demographic. The assumption, baked into nearly every home improvement TV show since the 1980s, that the woman hands the man the next tool and then looks impressed.
That's not biology. That's marketing deciding who the product is for. And you've been absorbing that message since before you could reach the hardware store shelf.
The confidence gap isn't a skills gap. It's a narrative gap — and narratives can be rewritten faster than skills can be built.
Where the Fear Actually Lives
I've talked to a lot of women about this. And here's what I've found: the fear is almost never "I'll break the furniture." The furniture is already wobbly. The fear is almost always something quieter.
What if I break myself?
That's the real thing. Not general incompetence — specific, embodied worry about the tool skipping, the bit catching, the kickback that's been described in hushed tones by everyone who ever wanted to discourage you. And that fear is worth taking seriously for exactly one reason: it points directly to the two things you should never skip — eye and ear protection.
Safety glasses run $5–15 at any hardware store. Foam earplugs are cheap and worth buying in bulk if you're drilling for more than a few minutes at a time. (Some hardware stores keep a jar of them at the counter; some don't — worth asking.) These are not heroic measures. They're the actual technical answers to the actual risk.
After that? The injury risk for standard household drilling, driving, and disassembly is low — substantially lower than a lot of things we do without thinking twice, like standing on an unstable chair to reach a shelf or hauling furniture without a dolly. The tools aren't where the danger typically lives. The improvisation is.
Three Scenarios That Change Everything
I'm not going to tell you to "build a bookshelf from scratch!" for your first project. That's like telling someone who's never swum to open-water race. Start where the impact is obvious and the stakes are bounded.
1. Install One Shelf With Anchors
Not a floating shelf system. Not a gallery wall. One shelf, on one wall, rated for actual weight.
Here's what you actually need: a drill/driver (corded or cordless, doesn't matter), a 3/16" masonry bit if you've got drywall over concrete (or a standard bit for stud/drywall anchor installs), a stud finder (the magnet kind works fine, usually under $20), your anchors, and your bracket hardware.
The sequence: find the stud OR use proper drywall anchors (not the cheap plastic expanding kind — the threaded kind you screw in directly). Mark. Pre-drill. Drive. Level. Done.
First time this takes 45 minutes. Second time, 12. By the third shelf, you're doing it on autopilot while listening to a podcast. The tool is not the thing. The repetition is the thing.
2. Disassemble Furniture for Repair
I do this constantly. I buy sad, wobbly FB Marketplace pieces that look structurally sound in the photos and then shake like a leaf when you apply lateral pressure. The fix is almost always the same: completely disassemble, clean the dried glue off the joints, re-glue with wood glue + clamps, and let it cure.
But to get there, you need to take it apart. And taking apart mortise-and-tenon furniture that's been factory-assembled with screws and staples takes a driver. Not hand-screwdriving for 40 minutes. A drill/driver on the "release" setting.
This is one of the lower-risk power tool scenarios you'll encounter. You're removing, not installing. The most common setback is a stripped screw head, which you handle with a screw extractor bit (around $8–12 at most hardware stores). The outcome when it works is a piece of furniture that costs you $40–60 total and lasts another 20 years.
3. Tighten a Wobbly Chair With a Drill/Driver
This is the one I'd actually start with, if you've never touched a drill before.
Most dining chairs wobble because the hardware has worked loose — either the screws have stripped out slightly or the wood has compressed around them. The answer: remove the screw entirely, fill the hole with a wooden toothpick and a drop of wood glue (I know this sounds absurd, it's completely legitimate carpentry), let it dry, then re-drive the screw.
A drill/driver on the lowest torque setting, with the correct Torx or Phillips bit. You're driving one screw into soft wood. The bit is barely spinning. This is, genuinely, the lowest-barrier entry point to power tool use that produces an immediate, measurable result.
After you do this once, you will understand — at a physical, embodied level — what the clutch does, how torque settings work, and why most people who do this regularly have an 18V drill they'd defend with their life. The tool will stop being a foreign object and start being the thing you reach for when furniture is misbehaving.
On Permission
Here's the thing about permission: nobody's going to give it to you. Not the way the marketing assumes you need — nobody's going to walk you into the garage and officially transfer the knowledge.
What you actually need is a 15-minute YouTube video (search "drywall anchor installation" or "drill/driver basics for beginners" — stick to channels that show real hands making real mistakes), and about $40–50 in tools you'll use a hundred times.
For the record: the actual minimum kit is a 12V cordless drill/driver (not the full 18V kit yet — start smaller), a basic bit set, safety glasses, and a tape measure. New, that combination typically runs $60–90 depending on brand and where you shop (as of early 2026). Used, a 12V Makita on Marketplace tends to surface in the $20–40 range, because plenty of people who upgrade to 18V move on the starter kit.
That's it. That's the entire setup cost for not having to wait for someone else to hang your shelves.
I'm not going to tell you this will change your life. I'm going to tell you it will change your specific, concrete relationship to your specific, concrete house. You'll look at a wall and instead of thinking "I need to ask someone," you'll think "I need a 1/4" bit and a toggle anchor." That shift is small and it is everything.
Your confidence is the only tool missing. Everything else is rented or cheap.