How to Create a Vertical Herb Garden in Your Kitchen

The Myth of the Green Thumb
Most people believe that growing a kitchen herb garden requires a backyard, a greenhouse, or a "natural gift" for plants. This is a misconception. Indoor gardening is not a mystical talent; it is a matter of structural planning, light management, and understanding the physics of drainage. If you have a vertical inch of wall space and a basic understanding of weight distribution, you can grow culinary herbs in a kitchen regardless of your square footage. This guide provides the technical framework for building a vertical herb garden that is aesthetically integrated into your kitchen design rather than looking like an afterthought.
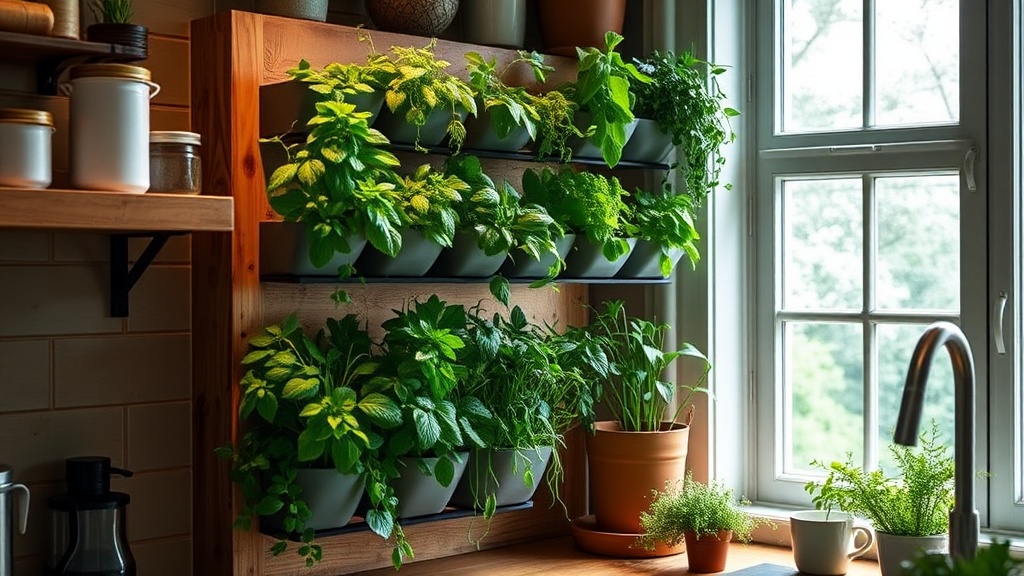
A vertical herb garden serves two purposes: it provides fresh ingredients for cooking and adds a living, textural element to your kitchen's interior design. By utilizing vertical space, you free up valuable countertop realft and turn an empty wall or backsplash area into a functional piece of living art. We will cover the structural requirements, the material selection, and the installation process to ensure your garden thrives without damaging your walls or causing moisture issues.
Phase 1: Assessing Your Kitchen Environment
Before purchasing a single pot or bracket, you must perform a site analysis of your kitchen. In architecture, we never design for a space without first understanding its constraints. For a vertical garden, your two primary constraints are light and moisture.
Evaluating Light Exposure
Herbs like basil, rosemary, and thyme require significant light to prevent "legginess"—a condition where the plant grows long, weak stems in search of light. Observe your kitchen window for one full day. If your window faces North, you will likely need supplemental lighting. If it faces South or West, you have optimal natural light. If you lack sufficient light, do not attempt to build a garden without integrating a dedicated light source. You can upgrade your lighting with smart bulbs or specialized LED grow lights to ensure your plants receive the correct spectrum of light throughout the day.
Mapping Moisture and Drainage
Water is the enemy of your kitchen walls. A common mistake is mounting pots directly against a drywall or backsplash without a moisture barrier. You must plan for "runoff." If you are mounting your garden near a stove, the heat and steam will also affect plant health. Ensure your vertical structure is at least 12 to 18 inches away from any heat-producing appliances to prevent the soil from drying out too rapidly or the plants from being scorched.
Phase 2: Choosing Your Structural System
There are three primary ways to build a vertical herb garden, depending on your skill level and the aesthetic of your kitchen. Each method requires a different approach to weight management and installation.
Option 1: The Wall-Mounted Rail System (The Industrial Approach)
This method uses a metal rail (similar to an IKEA Kungsfors system) mounted to the wall. It is highly modular and allows you to move pots around easily. This is ideal for modern or industrial-style kitchens. You will need a drill, a level, and a stud finder. Because these systems are heavy once the plants are watered, you must anchor the rail into a wall stud or use heavy-duty toggle bolts if you are mounting into drywall.
Option 2: The Floating Shelf Method (The Minimalist Approach)
Using reclaimed wood or sleek floating shelves creates a clean, architectural look. I recommend using 1x4 pine or cedar boards. Cedar is naturally rot-resistant, which is a technical advantage for a garden. When installing shelves, ensure the brackets are rated for the weight of the soil plus the water. Wet soil is significantly heavier than dry soil. If you are mounting these on a backsplash, ensure you are drilling into the tile or the substrate behind it, rather than just the decorative surface.
Option 3: The Pegboard System (The Modular Approach)
A wooden or metal pegboard allows for maximum flexibility. You can hang small terracotta pots or specialized metal tins using hooks. This is the best option for small kitchens because it allows you to reorganize the layout as your herb collection grows. A pegboard also provides a "buffer" between the plants and the wall, improving airflow.
Phase 3: Material Selection and Tool List
To execute this build, you need more than just a hammer and a dream. You need the right materials to ensure structural integrity and plant health.
The Tool Kit
- Power Drill and Drill Bits: For creating pilot holes and mounting hardware.
- Level: Essential for ensuring your shelves or rails are not slanted (which leads to uneven water distribution).
- Stud Finder: To locate the structural members of your wall.
- Measuring Tape: To ensure your vertical spacing is mathematically sound.
- Phillips Head Screwdriver: For tightening brackets.
The Container Selection
Do not just grab any container. For a vertical garden, weight and drainage are the two most important factors.
- Terracotta Pots: These are breathable and beautiful, but they are heavy and can be brittle. Use these only if your mounting system is extremely secure.
- Plastic or Resin Pots: Lightweight and durable. These are the best choice for high-mounted vertical gardens to minimize the risk of a heavy pot falling.
- Fabric Grow Bags: These are excellent for drainage and airflow, but they can look "messy" in a high-end kitchen design. If you use these, ensure they are tucked into a structured frame.
Phase 4: The Installation Process
Follow these steps to ensure your vertical garden is a permanent, safe addition to your kitchen.
- Mark Your Layout: Use a pencil and a level to draw your layout on the wall. Do not skip the level; a crooked herb garden is a design failure. If you are using shelves, mark the exact center of each bracket.
- Drill Pilot Holes: Always drill a pilot hole before driving a screw. This prevents the wood from splitting and ensures the screw goes in straight. If you are drilling into a wall stud, use a 1/8-inch bit.
- Install Hardware: Mount your rails, shelves, or pegboard. If you are not hitting a stud, use toggle bolts. Standard plastic wall anchors are often insufficient for the weight of a living, watered garden.
- Apply a Moisture Barrier: If your shelves are directly against the wall, consider applying a thin sheet of acrylic or a waterproof backsplash material behind the plants. This protects your paint or wallpaper from splashes.
- Potting and Placement: Fill your containers with a high-quality potting mix. Do not use garden soil; it is too heavy and lacks the drainage required for indoor containers. Once potted, place the herbs in their new homes, starting with the heaviest pots at the bottom.
Phase 5: Maintenance and Design Integration
Once your garden is installed, the work shifts from construction to maintenance. To keep your kitchen looking organized and professional, you must manage the "visual clutter" that plants can create.
The Math of Watering
Vertical gardens dry out faster than floor-level plants because heat rises. If your garden is near the ceiling, you will likely need to water more frequently. A good rule of thumb is the "finger test": stick your finger one inch into the soil. If it feels dry, it is time to water. To prevent water from dripping onto your kitchen counters, use a tray system or ensure your pots have a deep enough rim to contain any overflow.
Pruning for Shape
To maintain the architectural look of your garden, you must prune regularly. Do not let your herbs grow wild and "shaggy." Frequent harvesting actually encourages bushier, more compact growth. For example, when harvesting basil, always cut just above a leaf node. This forces the plant to branch out rather than growing a single, long, weak stem.
Color and Texture Coordination
To make the garden feel like a part of your kitchen design rather than a science project, coordinate your container colors with your existing hardware. If you have matte black faucet fixtures, use black metal or dark ceramic pots. If you have a farmhouse-style kitchen with white subway tile, use terracotta or white ceramic. This level of intentionality is what separates a DIY project from a professional interior design element.
By treating your vertical herb garden as a structural installation rather than a simple decoration, you ensure it remains a functional, beautiful, and safe part of your home for years to come.
Steps
- 1
Choose your mounting system
- 2
Select your herb varieties
- 3
Prepare the drainage and soil
- 4
Install and water your plants